This article describes how to upgrade the DGP’s firmware via USB connection to a Windows computer.
To upgrade the firmware, you need the following:
- A powered and functioning DGP
- A Windows PC with a USB 2.0 port
- Tecom Firmware Loader application (see attached at bottom of page)
- Firmware (blupg_PCB1020_V.....)
- Access to the DGP’s printed circuit board (PCB)
- A USB cable (Type A Male to Type B Mini Male) to connect the Windows computer to the DGP’s PCB
- Firmware upgrade file
Upgrade process
To upgrade the DGP’s firmware:
1. Disconnect the DGP’s power supply.
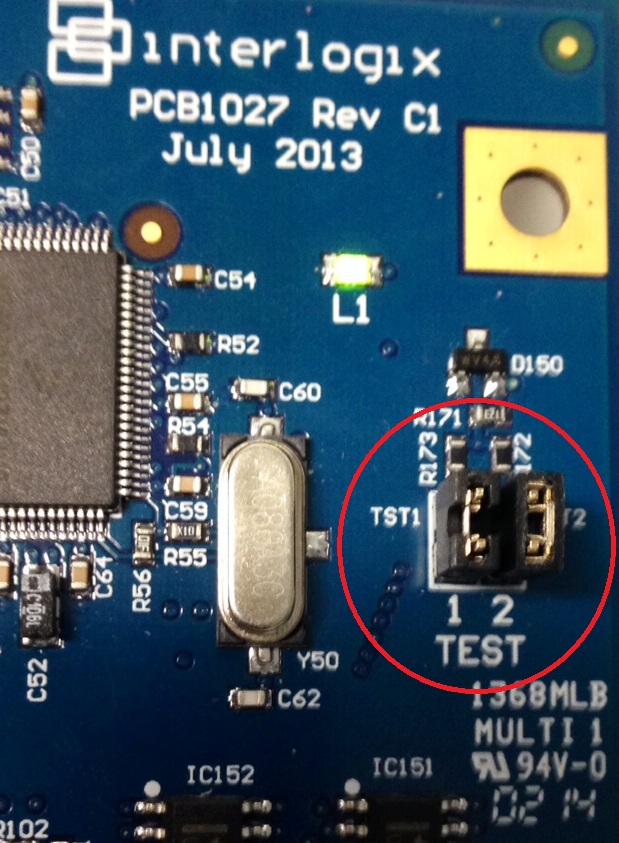
2. Fit test links 1 and 2
3. Reconnect power to the DGP. LED L1 will blink rapidly.
4. Use the USB cable to connect the computer to the DGP’s USB port (Figure 2 on page 7, item 1). The first time you connect a DGP to the computer’s USB port, the Found New Hardware Wizard may display. If the Found New Hardware Wizard does not display, go directly to step 9.
5. If the wizard asks “Can Windows connect to Windows Update to search for software?”, click to select the “No, not this time” radio button, and then click Next.
6. If the wizard asks “What do you want the wizard to do?”, click to select the “Install from a list or specific location” radio button, and then click Next.
7. Click to select the “Search for the best driver in these locations” radio button, and then browse to include the location of the Tecom Firmware Loader application in the search (for example, C:\Program Files\Tecom Firmware Loader\inf_driver). 14 TS1020 Analogue Data Gathering Panel Installation Manual
8. Run Tecom Firmware Loader (Link at bottom of page for current firmware loader)When you run it will tell you if the device is ready, otherwise you can’t select a file.
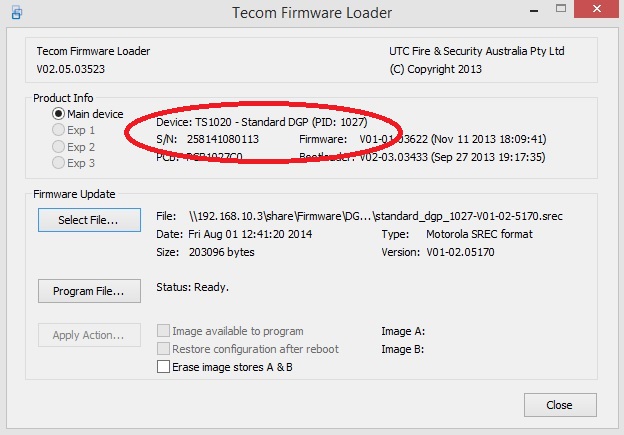
9. Click Select File… and then browse to the location of the firmware upgrade file on your computer.
Select the file and then click Open.
10. Click Program File… to update the DGP firmware. The process will take several minutes. The percentage completion displays at the bottom of the window. When finished, a “Programming is complete” message displays.
11. Remove the USB cable from the DGP.
12. Disconnect the DGP’s power supply.
13. Remove test links 1 and 2.
14. Reconnect power to the DGP.
15. Use DGP menu option 4 to display the DGP version number. It should display the new version number.
16. We recommend that you also default the DGP’s programming. Use DGP menu option 5 to reset all custom programming to “Factory Default"