The new Tecom software platform now consists of 2 separate pieces of software.
- CTPlus for panel programming
- TecomC4 for user / site management
Both CTPlus and TecomC4 can be installed on the same machine (each software has its own comms path)
Step 1: Security Commander
First, we will export the users and credentials from Security Commander and put them into a CSV file, then ready the file to import into TecomC4.
On the Security Commander server PC, make a directory on the “C” drive called “temp”, and copy the SC_export.bat file attached with this document to that folder.
This is a simple SQL query batch script to get the current active users from the Security Commander database, and will save the users in CSV format so they can be imported into TecomC4.
Alternatively, you may copy and paste the text below (between the arrows) into a file called SC_export.bat and save it to the temp directory.
==>>
@echo off
echo Running Export
sqlcmd -S .\SPSQL -d alliance8300 -E -Q "SELECT PersonId, FirstName, LastName, MiddleName1, MiddleName2, Initials, EmployeeNumber, TcProfileId, PersonNo, CARD.CardNo, CARD.sitecode FROM [Alliance8300].[dbo].[PersonTable] PERSON INNER JOIN [Alliance8300].[dbo].[TcCardTable] CARD ON CARD.PersonId = PERSON.Id WHERE CARD.Status = 1" -s "," -o "c:\temp\SC_export.csv"
if not errorlevel 1 goto next1
echo == An error occurred
:next1
echo DONE
echo --FILE-- c:\temp\SC_export.csv
:exit
<<==
(PLEASE NOTE: the sqlcmd line must be all in one line or it will not work!)
Once you have the batch file saved to “C:\temp\sc_export.bat”, open a command prompt, navigate to the folder C:\temp, and run “SC_export.bat”. See example below.
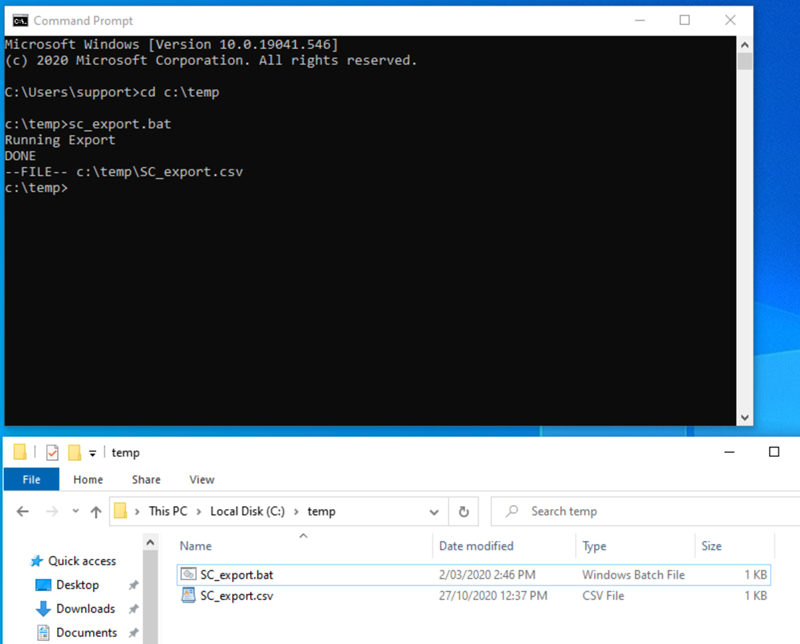
When completed, this will have generated a CSV file, however this file will require some modifications before it’s ready for the TecomC4 import process.
There are 3 steps involved here, and you can use software such as Excel to achieve these changes easily:
1. Delete the second row (which should contain only spacers in the form of dashes)

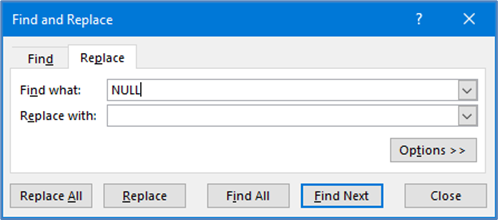
2. Perform a find and replace on the entire worksheet, searching for ‘NULL’ and replacing with no text (just leave the ‘replace’ field blank)
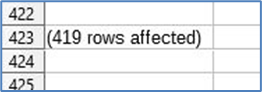
3. Delete the last row (which should contain only information about the total number of rows)
Step 2: Adding and configuring the panel in CTPlus
The next step is to add your panel(s) into CTPlus, and configure them in preparation to connect to TecomC4.
1. Create a Panel in CTPlus.
Under Operations, click on Connections, this will open a new window.
In Connections, click on “+” button as can be seen in the picture below, this will open a new window.
2. Fill in the configuration details and bring the panel online. 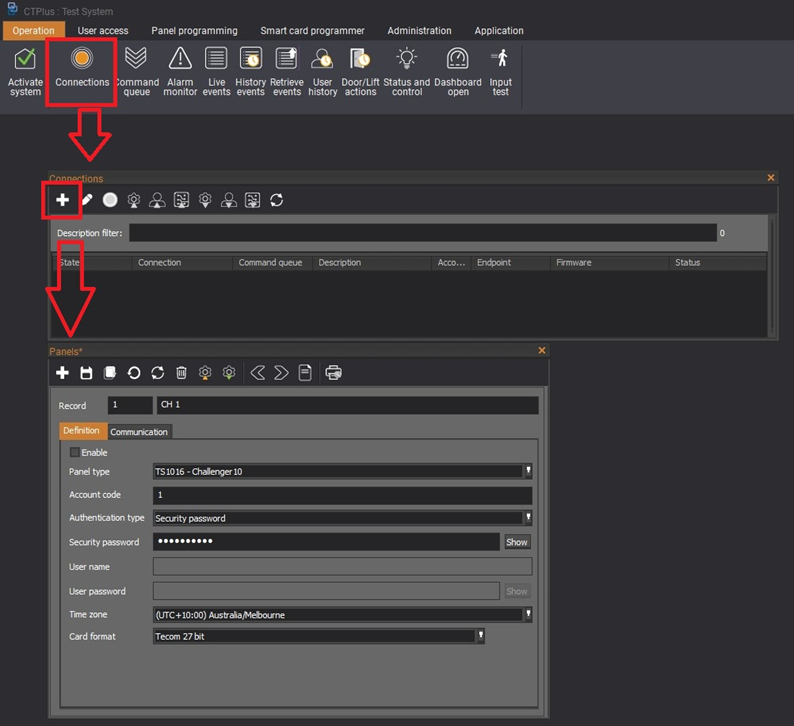
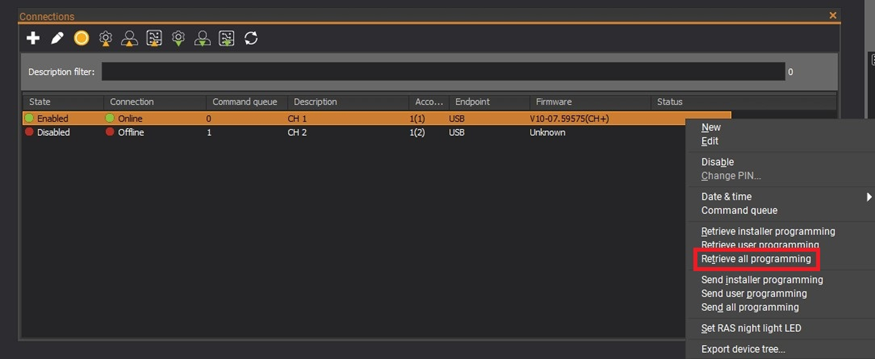
3. Once the panel is online, right click on it from within the Connections form and select “Retrieve all programming” to retrieve the programming from the panel and save it into the CTPlus database.
4. Repeat this process for each panel in the Security Commander System.
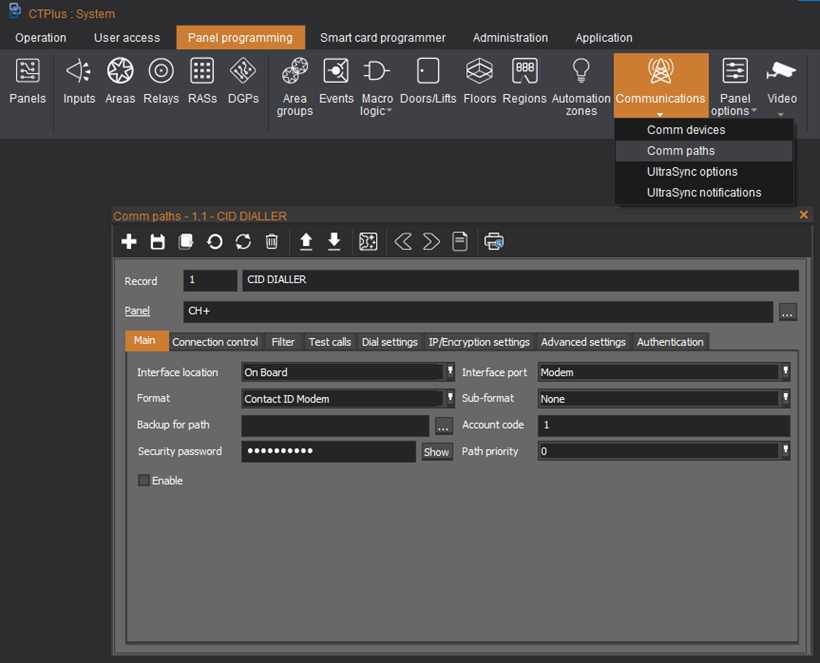
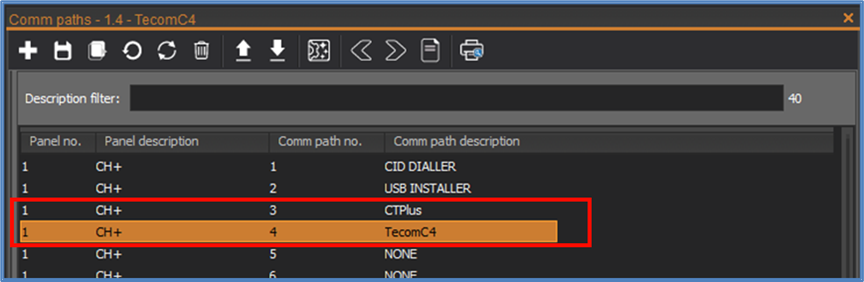
5. Under Panel Programming, click on Communication > Comm Paths. Navigate to an empty path, and using the Config Wizard ( ), set up comms paths on each panel for the TecomC4 Connection. This should be in addition to your existing path to CTPlus, resulting in one path configured for connection to CTPlus (e.g. Comms Path 3) and one path configured for connection to TecomC4 (e.g. Comms Path 4).
Step 3: Adding devices and users in TecomC4
The final step is to add your devices into TecomC4, import your users, and then create and assign access levels.
1. Under Navigation > Credential types, configure TecomC4 with the correct card type. Please be aware that only known card types will work. 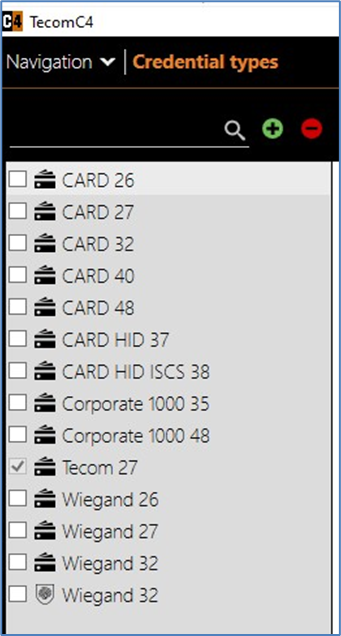
2. Ensure that your TecomC4 system is licensed for the number of panels you intend to add. Each panel = 1 license.
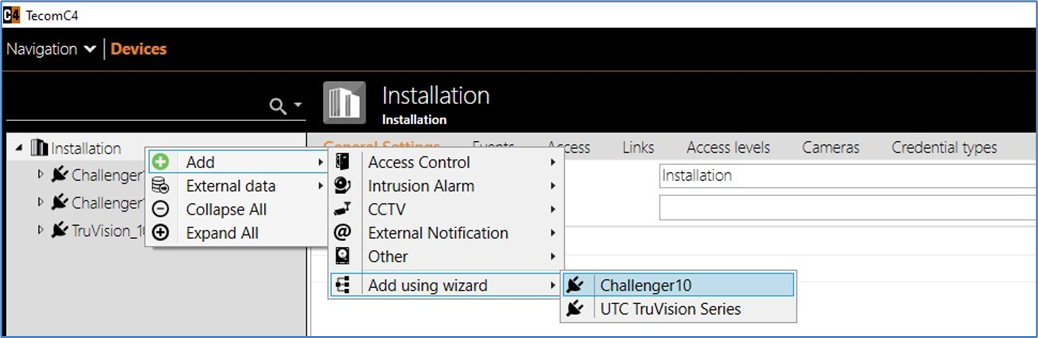
3. Under Navigation > Devices, add each panel to TecomC4 by right-clicking on the top level ‘Installation’ and selecting Add > Add using wizard.
Note: DO NOT attempt to add the device manually under ‘Access Control’ or ‘Intrusion Alarm’, as this will be very time consuming and extremely prone to user error.
4. As panels are added, assign the required credential type(s) to the panel under General Settings.
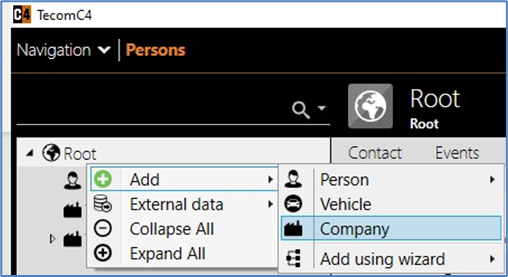
5. Under Navigation > Persons, add a new company to your Root level.
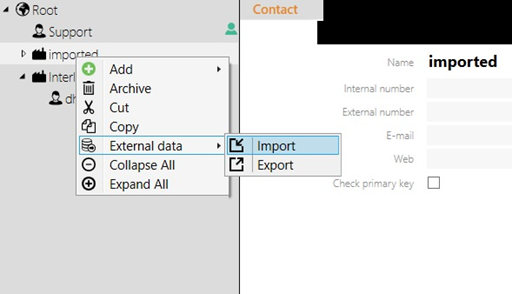
6. Right click on the created company (e.g. “imported” is used below), then click External data > Import, and select the csv file created from the previous steps (e.g. C:\temp\SC_export.csv).
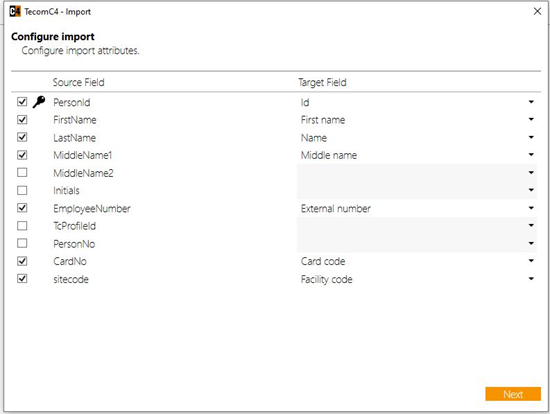
7. Select the correct mapping fields (Source = CSV, Target = TecomC4) and click Next to import the external data CSV file into TecomC4.
8. Once users are imported, they will be sitting under the Company group created above. This may take some time depending on the number of users, so please be patient.
9. Create your Users structure (if you haven’t already) and move users from the imported group to your new setup.
10. Now that devices and users are configured, create access levels and assign as required to users and/or groups, and continue setting up your TecomC4 system to your site’s requirements.